
Marble Tile 101: The Complete Guide

Coveted for its unique beauty, marble is a popular natural stone choice worldwide — and across a range of interiors and exteriors. It immediately creates a statement of elegance, craftsmanship, and exclusivity.
This incredible natural stone can also be used to create bold patterns that make for extraordinary entrances, imaginative interiors, and more.
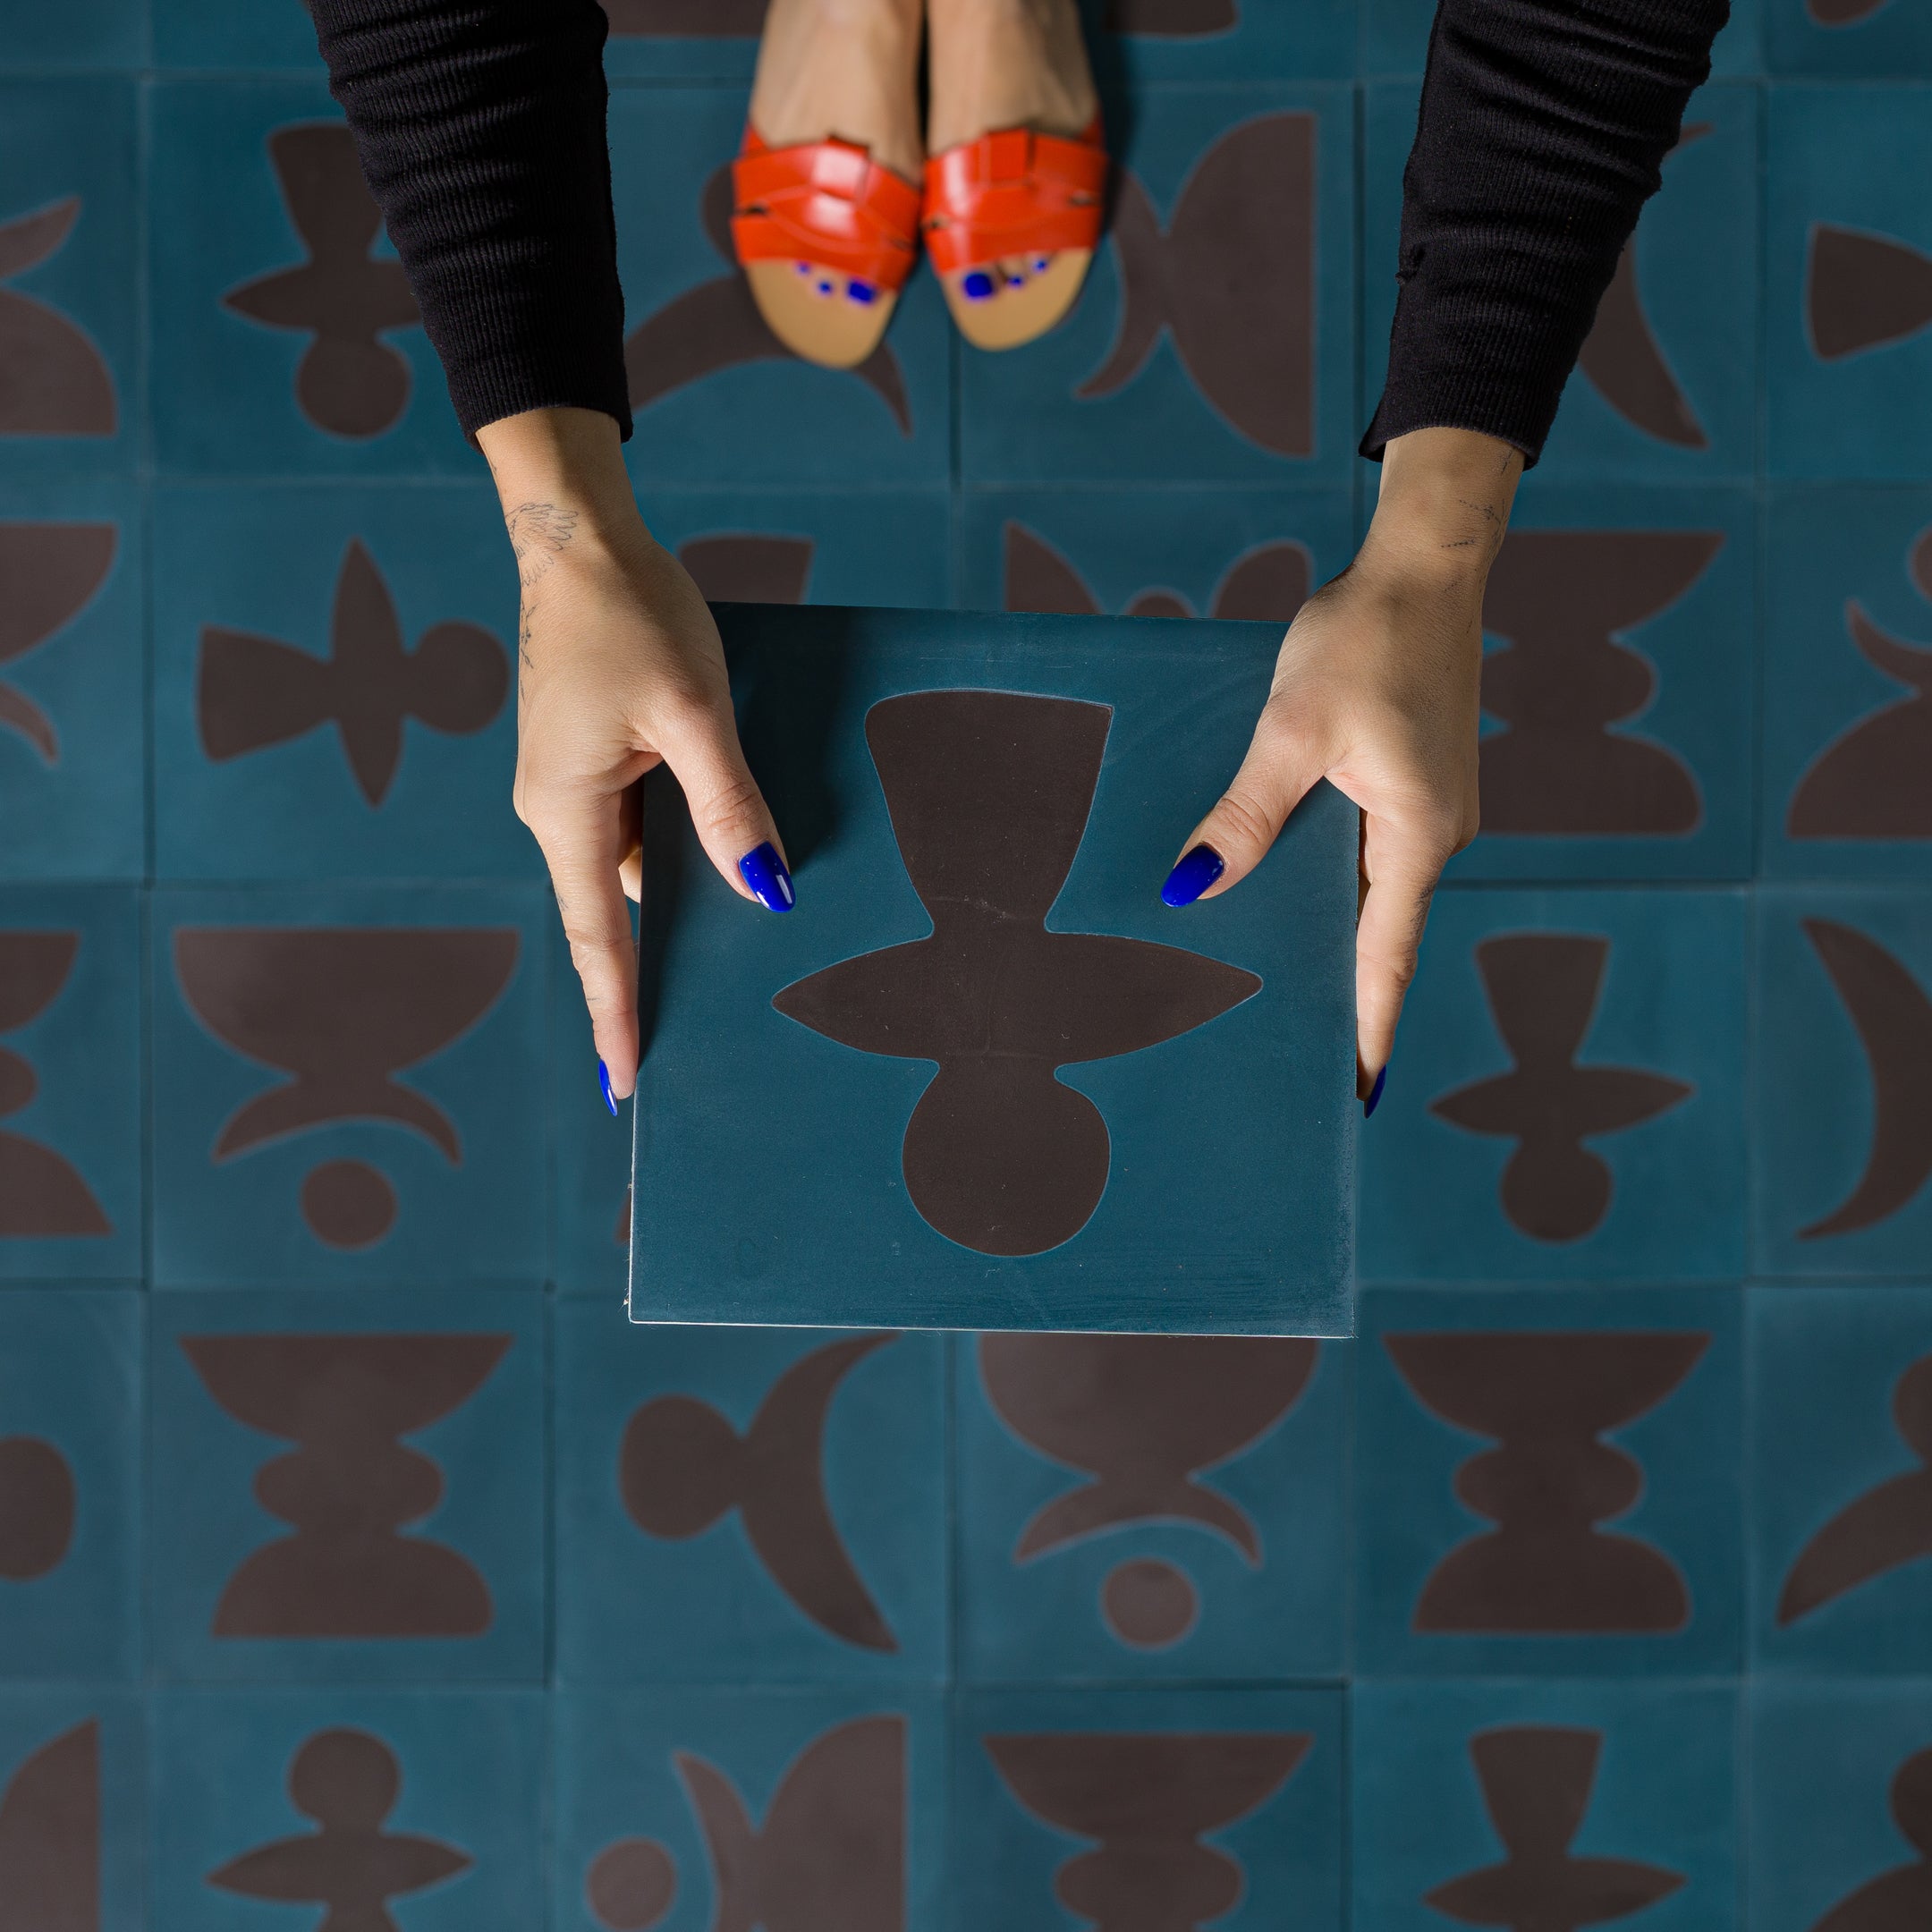
Inspired by the beauty of the marble material and Art Deco design, Otto Tiles & Design’s Signature Marble Collection embodies the natural beauty and the creativity inherent in this natural stone. This series of original marble tiles is handmade by artisans and blends heritage, artistry, and modern aesthetics.
In this comprehensive guide to marble tile, we’ll walk you through everything you need to know about this product — from the types of marble tile to where to use them, how to install them, and how to take care of them.
Of course, we’ll also share the inspiring stuff, like creative examples of how to use marble tile in your own home. Let’s dive in.
What Is Marble Tile?
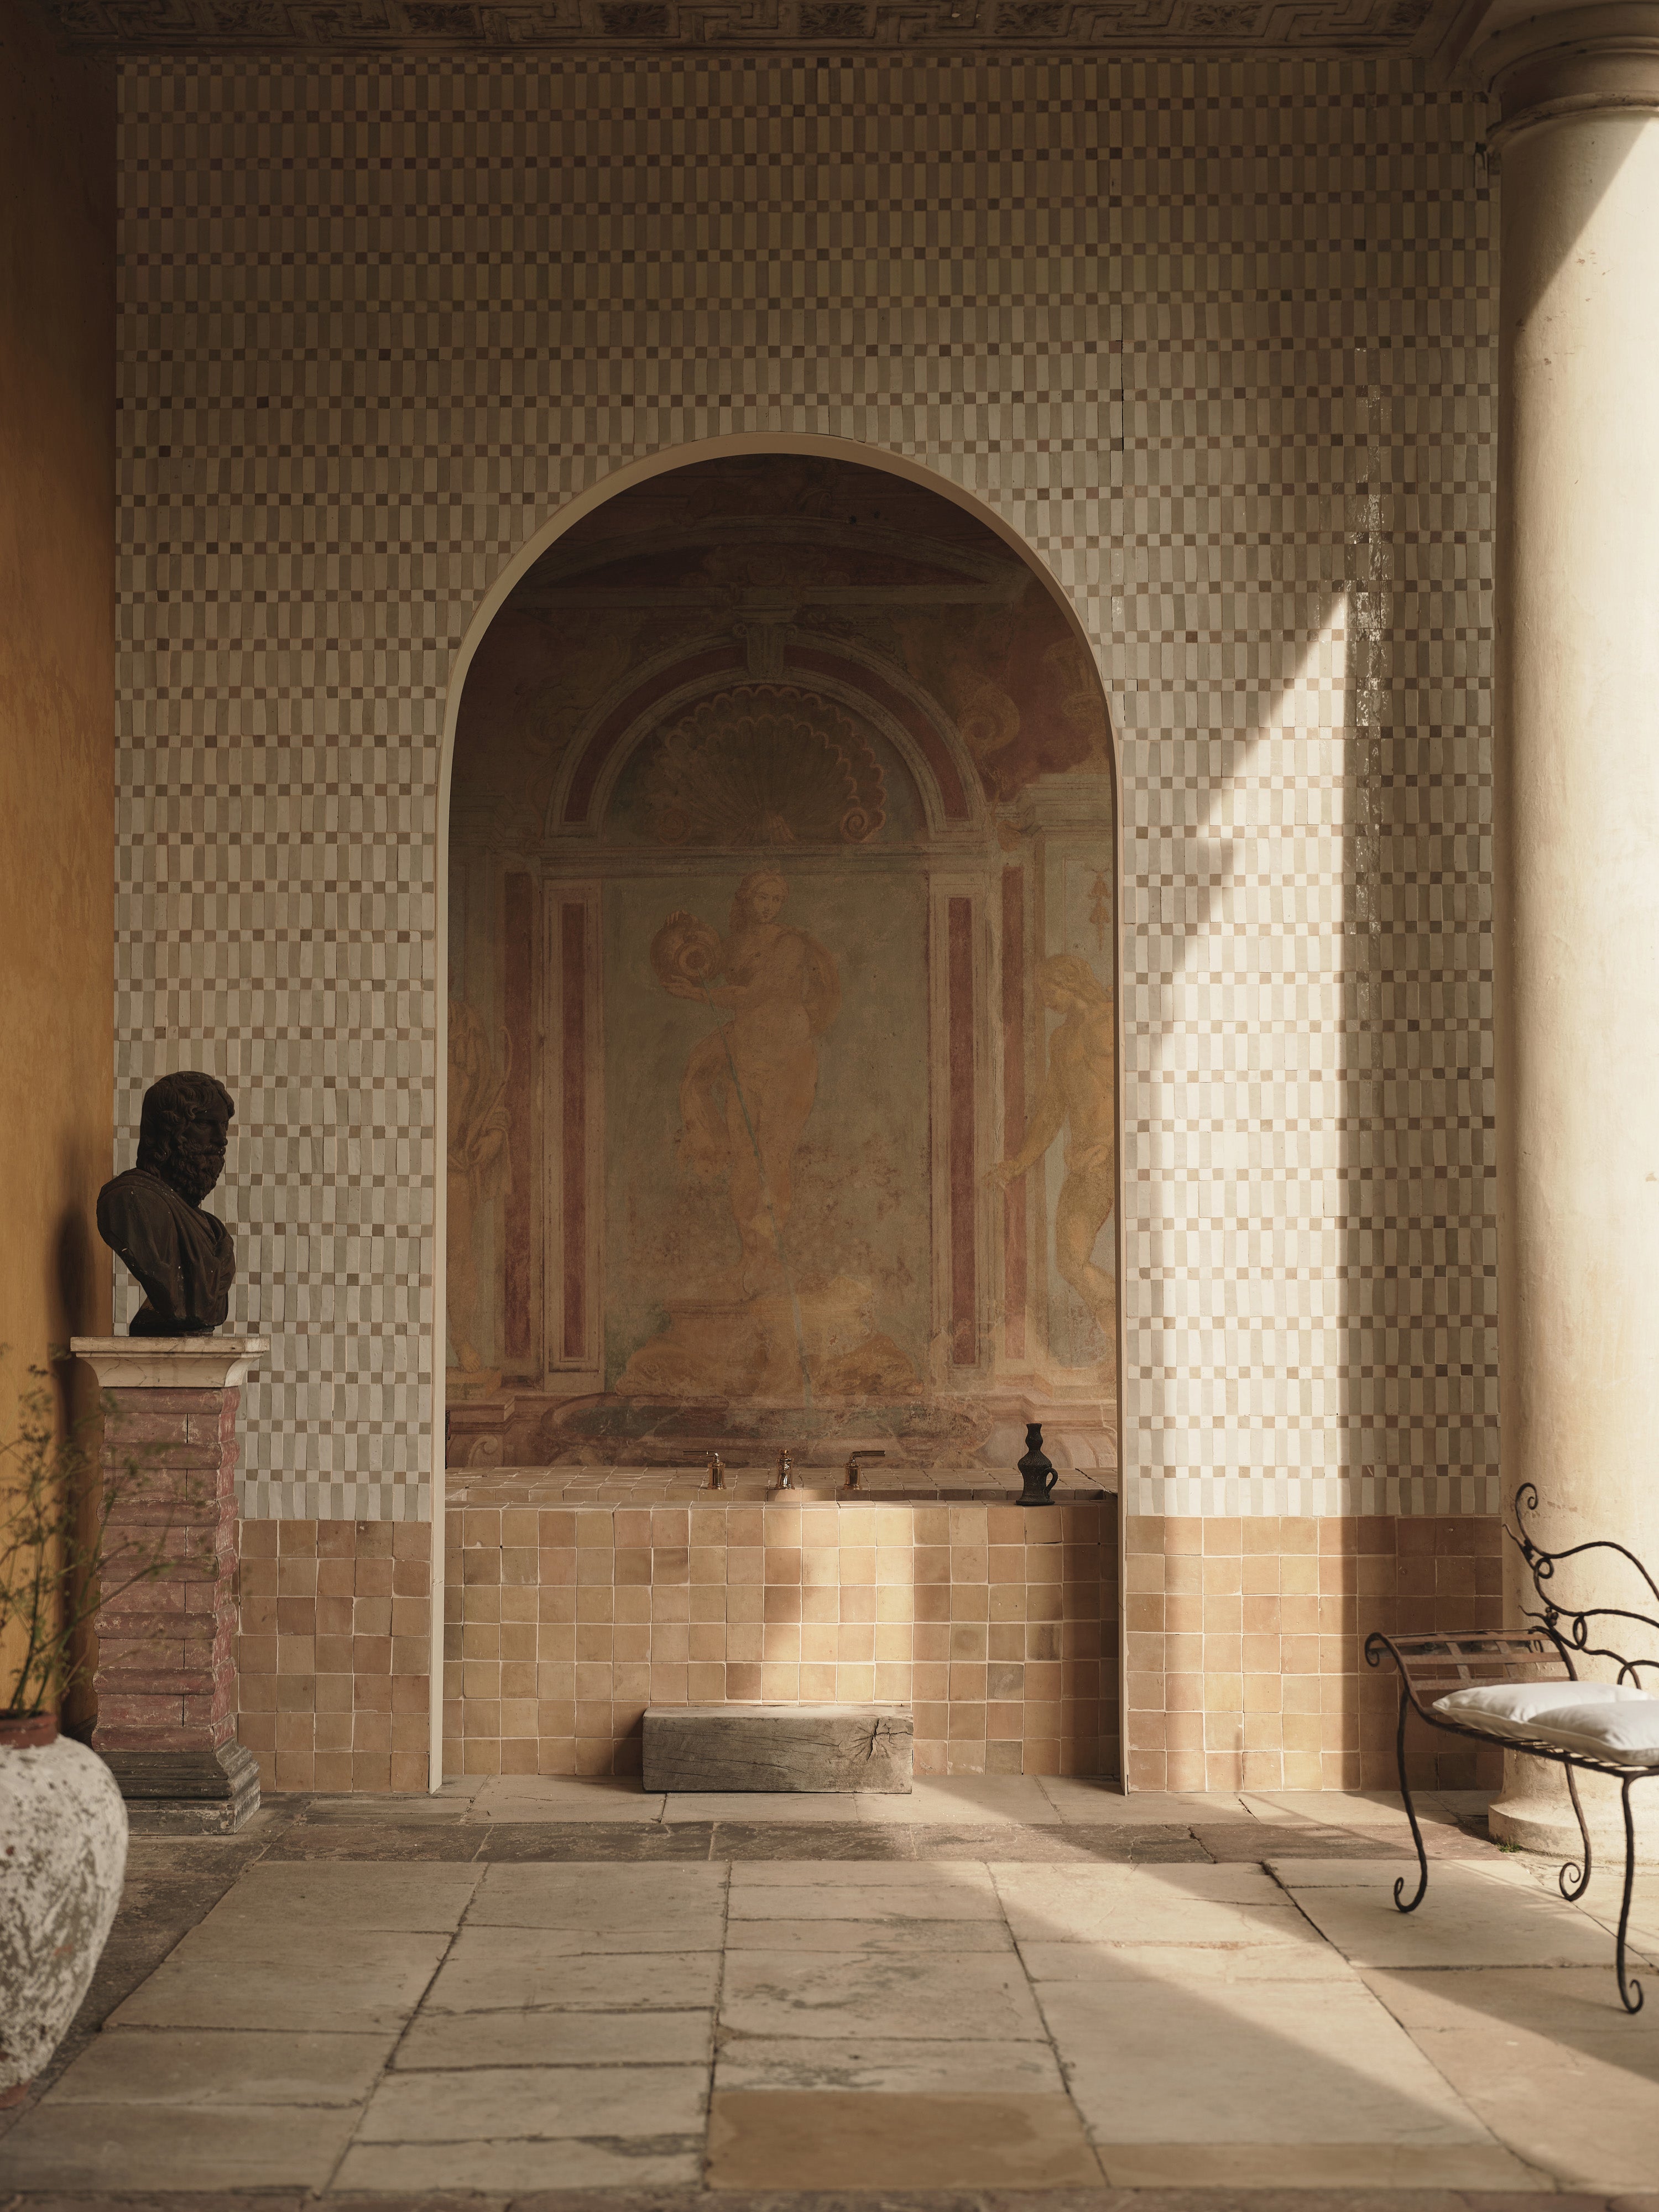
A classic estate flush with marble checkerboard floors…
A sleek, modern high-rise with a spa-inspired toilet clad in Calacatta…
A minimalist residence with a white Carrara marble chef’s kitchen…
These are just a few examples of how marble tile sets an elevated, luxurious, and timelessly elegant tone across styles and spaces.
A natural stone, marble is prized for its distinct veining and shading. This unique trait creates variations from tile to tile — and that is a huge part of its beauty because no two tiles are exactly alike! These signature markings, which can be either subtle or strong, are what make marble’s appearance so statement-making.
If you’ve ever stopped to wonder how marble tile is actually made, the journey starts long before it reaches a showroom. Deep beneath the earth’s surface, marble is carefully quarried from natural stone deposits, extracted in massive blocks using specialized equipment.
Those blocks are then transported and sliced into slabs with diamond-tipped saws — a precise process that allows the stone’s natural veining to fully reveal itself. From there, each slab is ground and polished to achieve the desired finish before being cut down into individual tiles. Size, shape, and thickness can all vary depending on how the stone will ultimately be used.
At Otto Tiles & Design, we begin by hand-selecting exceptional marble from Italy, then transform it into distinctive pieces that celebrate the stone’s natural character; no two are ever exactly alike.
Types of Marble Tile
Marble tiles come in a range of options, and they can be as varied as their beautifully unique colours and veining. Here are some of the main categories you may want to consider:
1. Solid Marble Tile
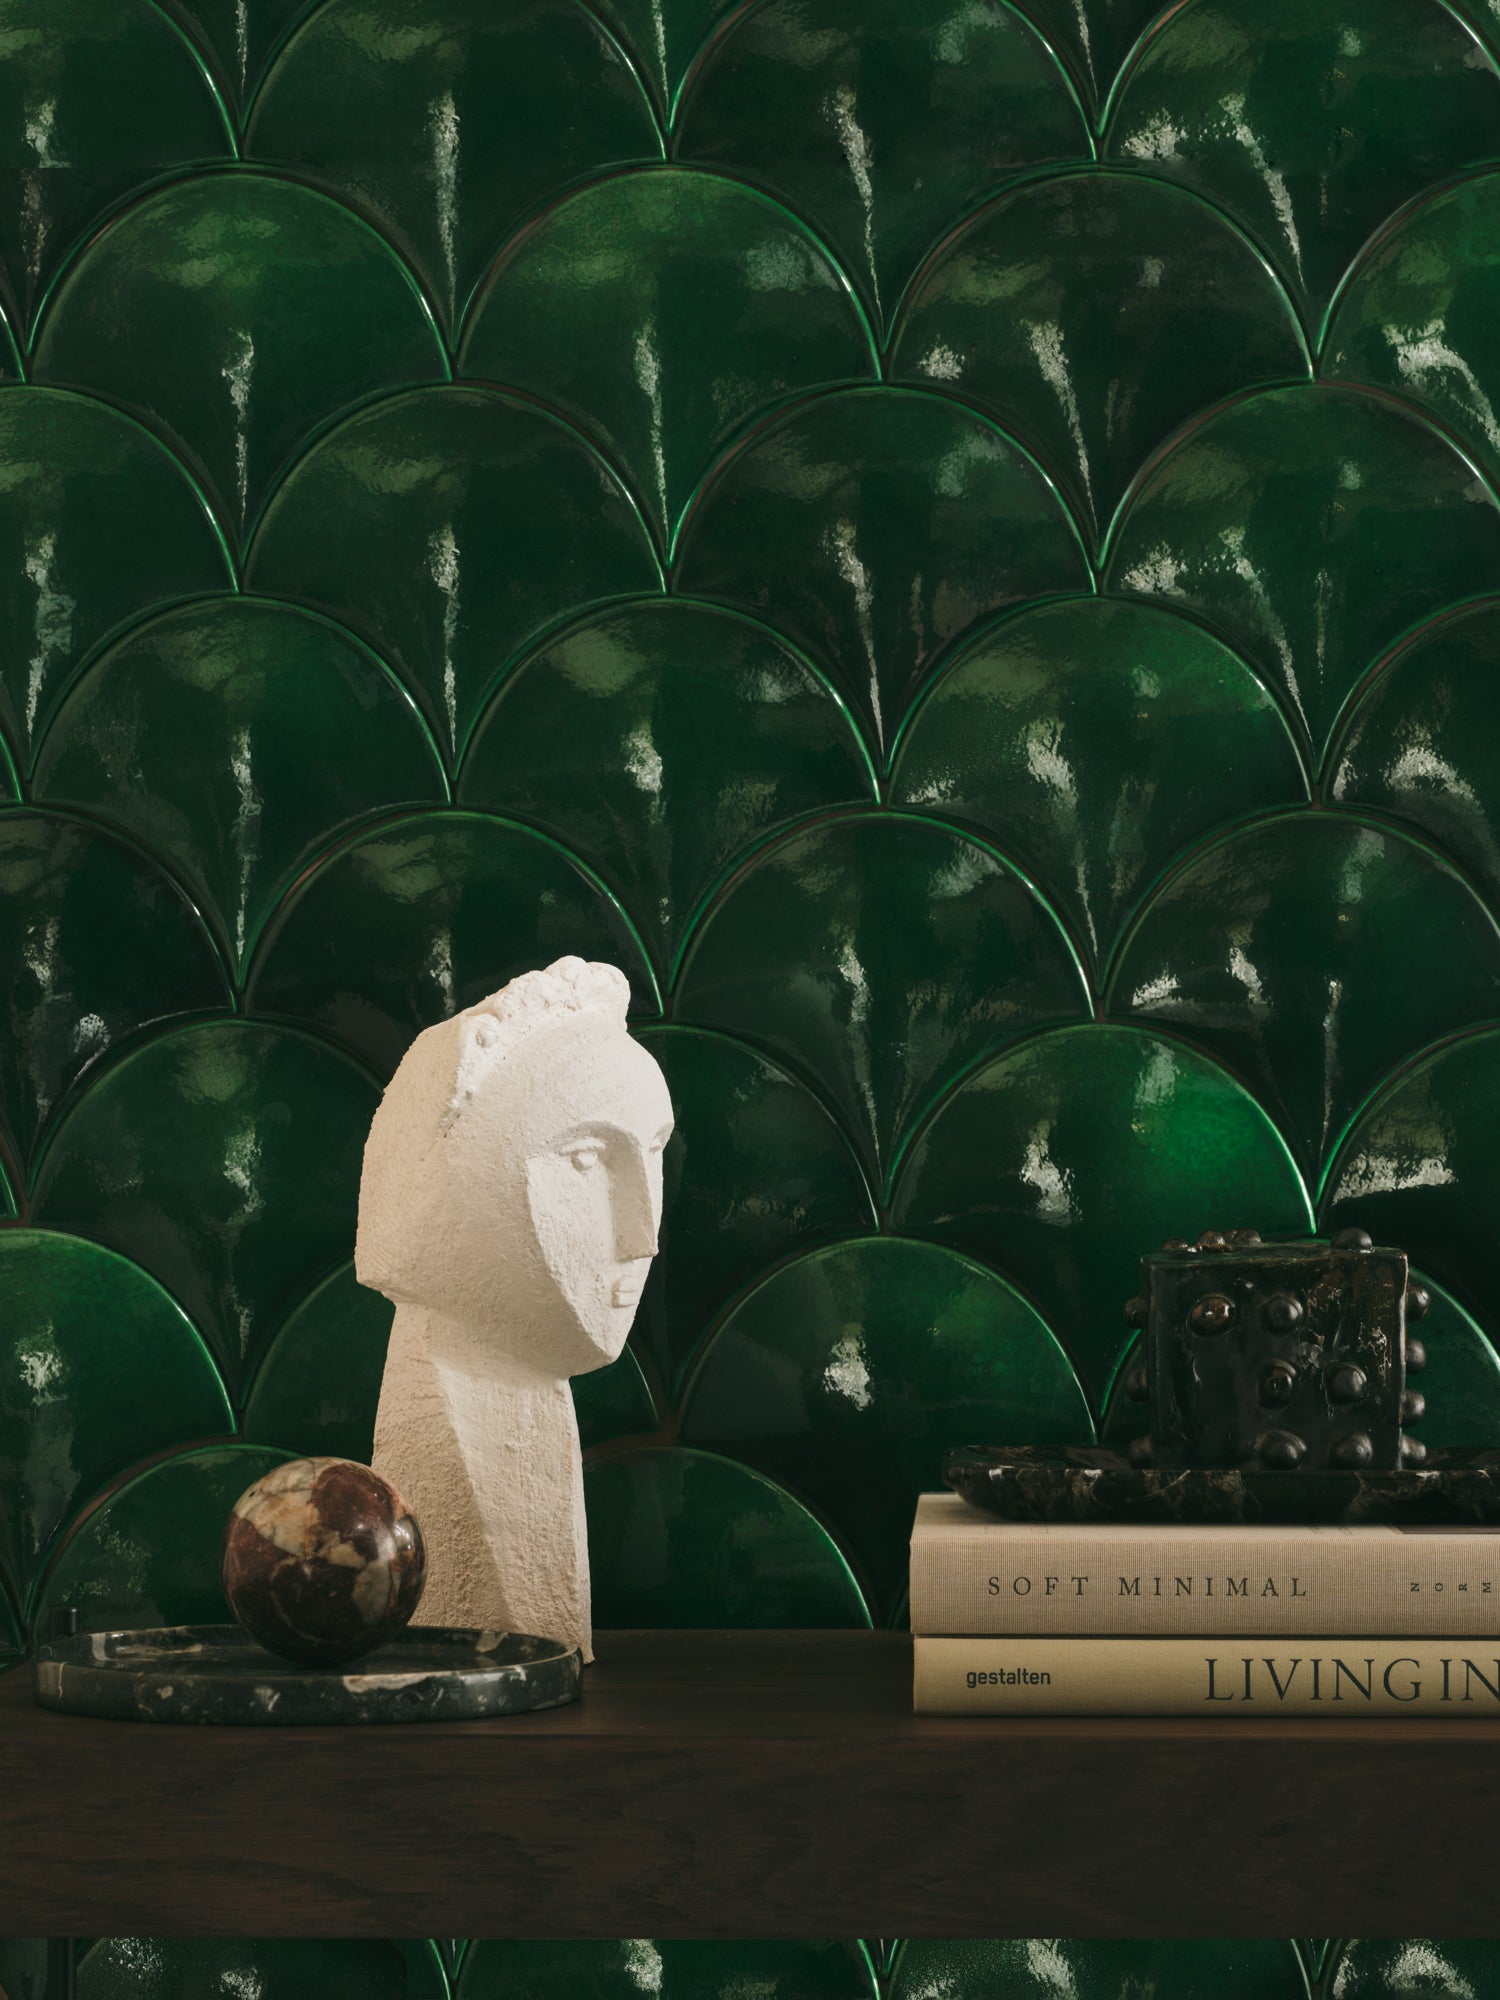
Solid marble tile — like Carrara, a white marble tile — is a classic form that you may immediately think of. In addition to Carrara, some of the most popular types of solid marble tile include Calacatta (white with gold veining) and Nero Marquina (deep black with white veining), along with warm neutral colourways. But there are many additional colour-saturated options, too, like natural pinks, emeralds, and more.
Solid marble tiles are perfect for timeless, elegant looks and pair well with many styles, including minimalist, modern, and traditional interiors.
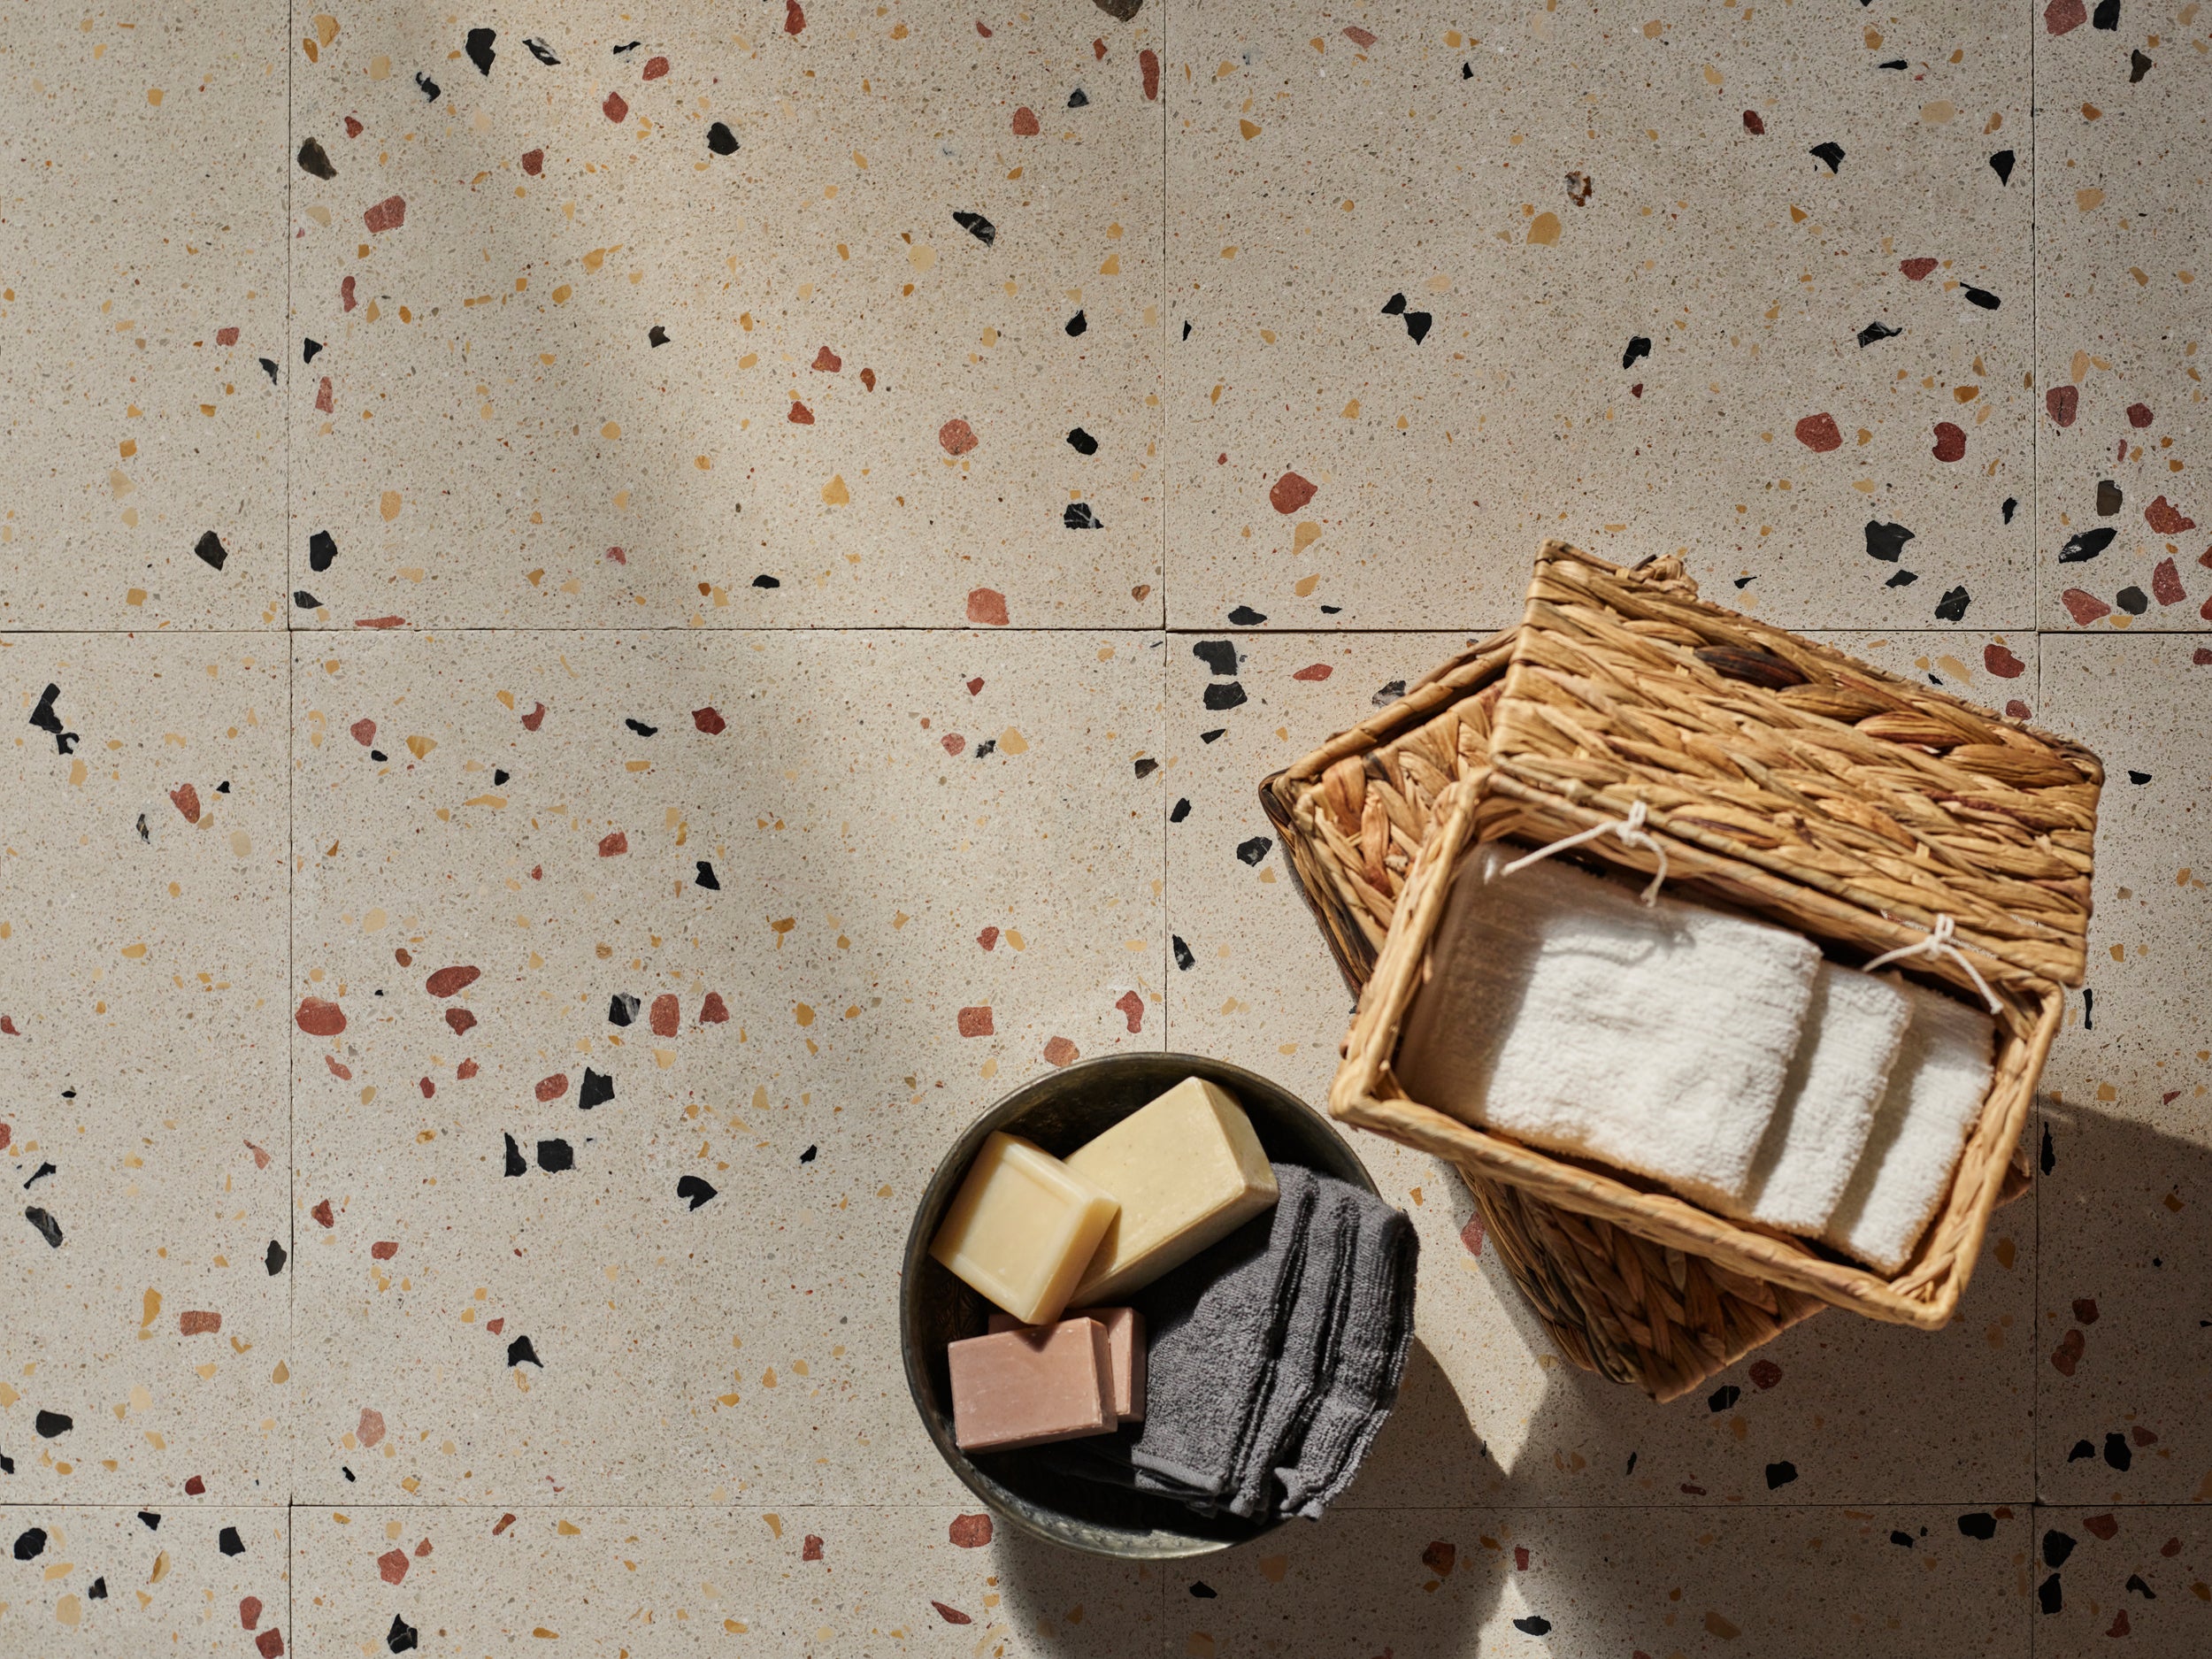
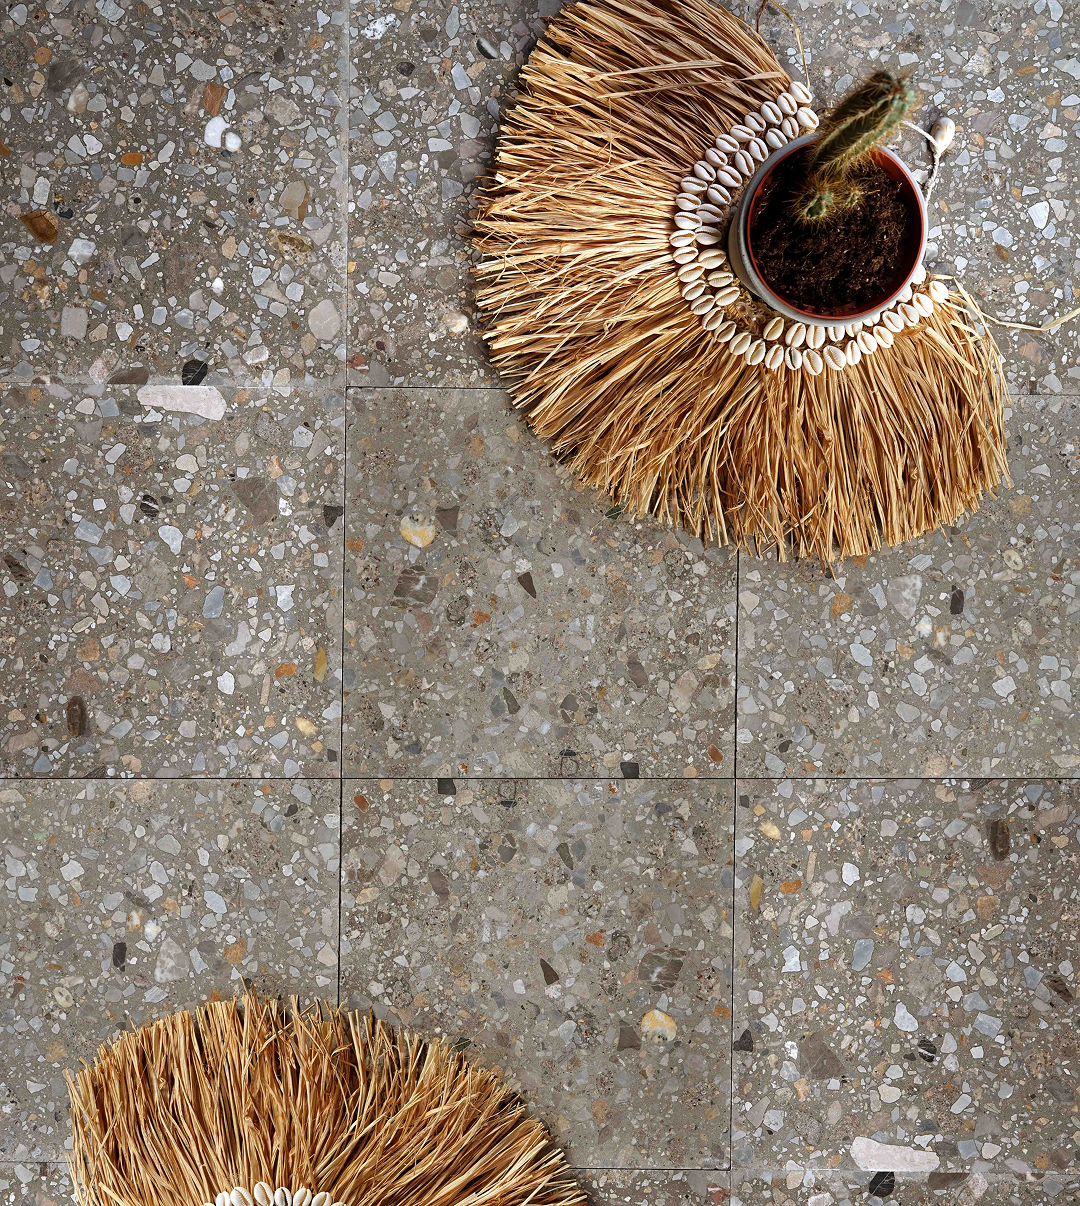
2. Marble Mosaic Tile
When you think of a mosaic piece, you may envision multiple small pieces working together to create a cohesive design. And that’s exactly what marble mosaic tiles do. They are composed of small marble pieces assembled into eye-catching patterns on mesh sheets, with patterns ranging from subtle to bold. Regardless of the design, this type of marble tile is geometric and intricately designed. It works wonders as backsplashes, accent walls, shower floors, or feature floors because it adds dynamic visual interest.
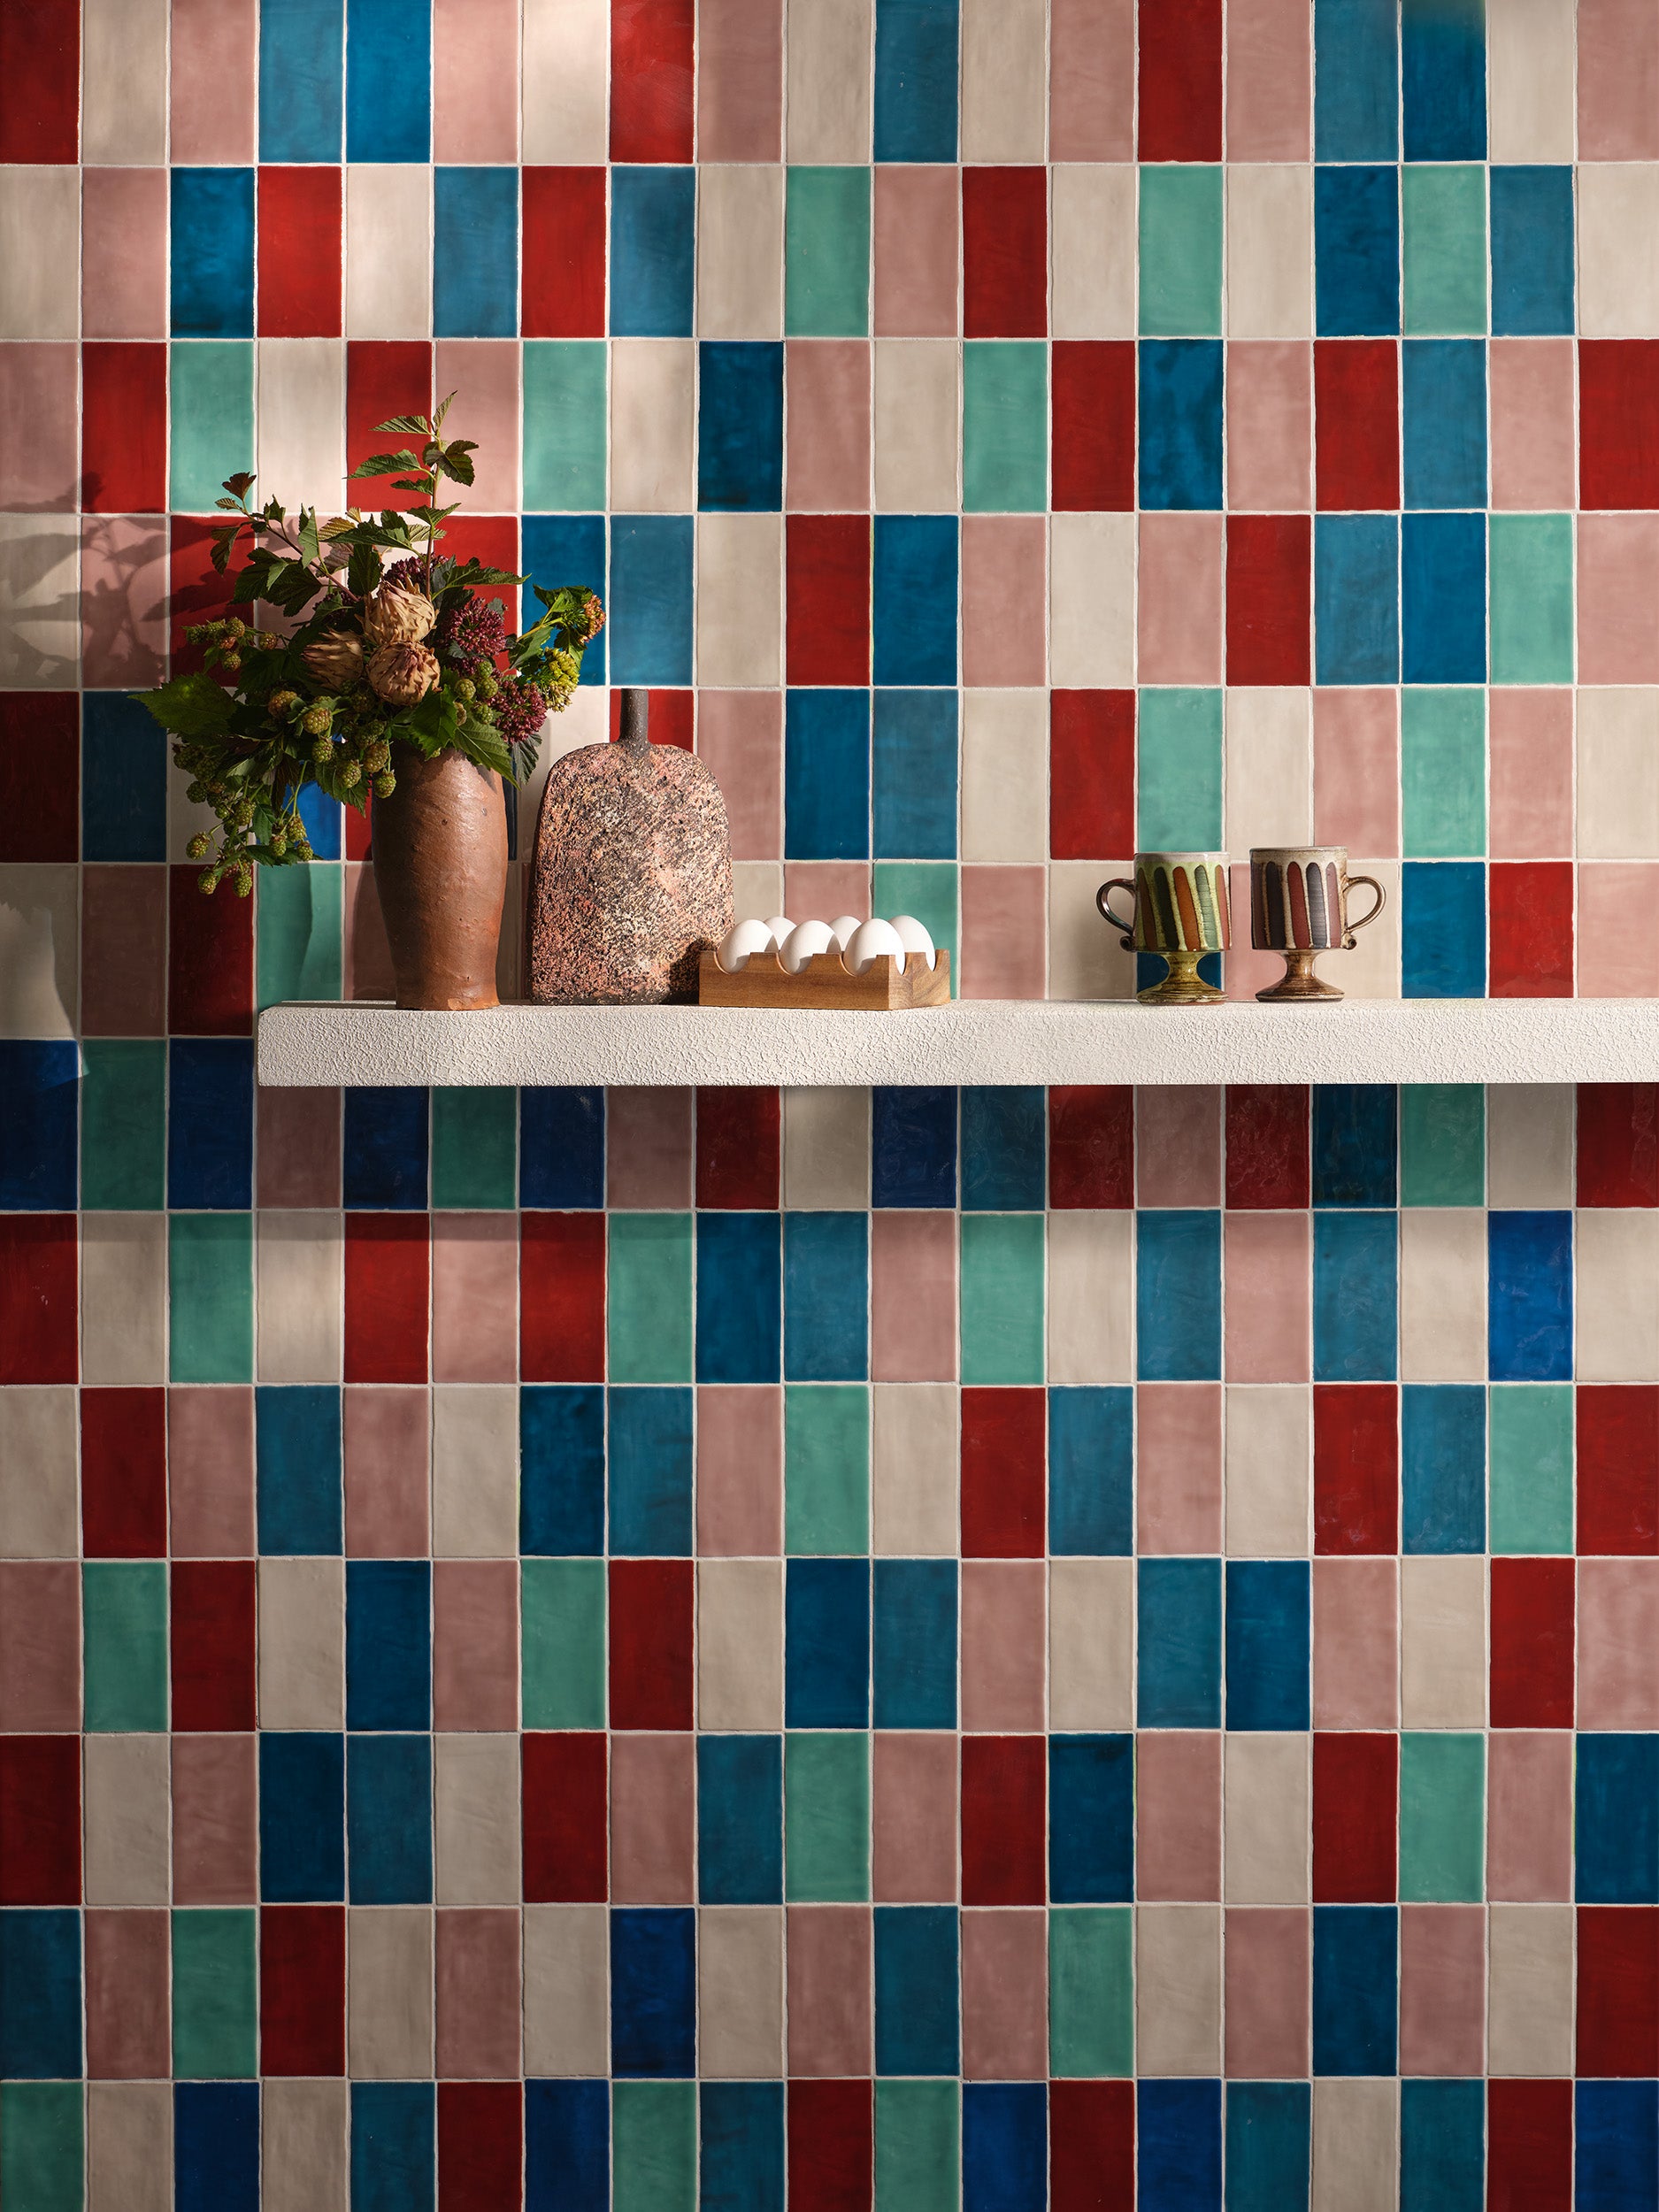
3. Patterned Marble Tile
Unlike traditional marble, patterned marble tile combines the natural beauty of stone with bold artistic designs. Some collections mix shapes, colours, and motifs to create visual statement pieces that act as art on walls or floors rather than just a backdrop.
At Otto Tile & Design, each signature marble pattern is a one-of-a-kind creation, meticulously designed by our artisans and crafted with state-of-the-art CNC technology. The result is marble so seamless, it feels as though nature itself shaped it to perfection.
Bonded with the finest epoxy and finished with invisible grout lines, every option embodies refinement and rarity, making a space-defining statement.
Where Can You Use Marble Tile?
From marble-clad kitchens and toilets to striking accent walls and stunning marble floor tile, this material is relatively versatile and suitable for:
-
Counters
-
Walls
-
Floors
-
Wet areas like showers
-
Backsplashes
-
High-traffic commercial areas
-
Indoor and outdoor uses
-
Underfloor heating areas
Design Inspiration for Marble Tile
When it comes to using marble tile in your space, consider these ideas for creative inspiration:
Love Triangle
For sleek and elegant floors, Marble Triangles create an impact with their geometric pattern in monochromatic tones. The marbles used in this bonded tile pattern include: Nero Marquina, Bianco Carrara, and Tundra Grey.
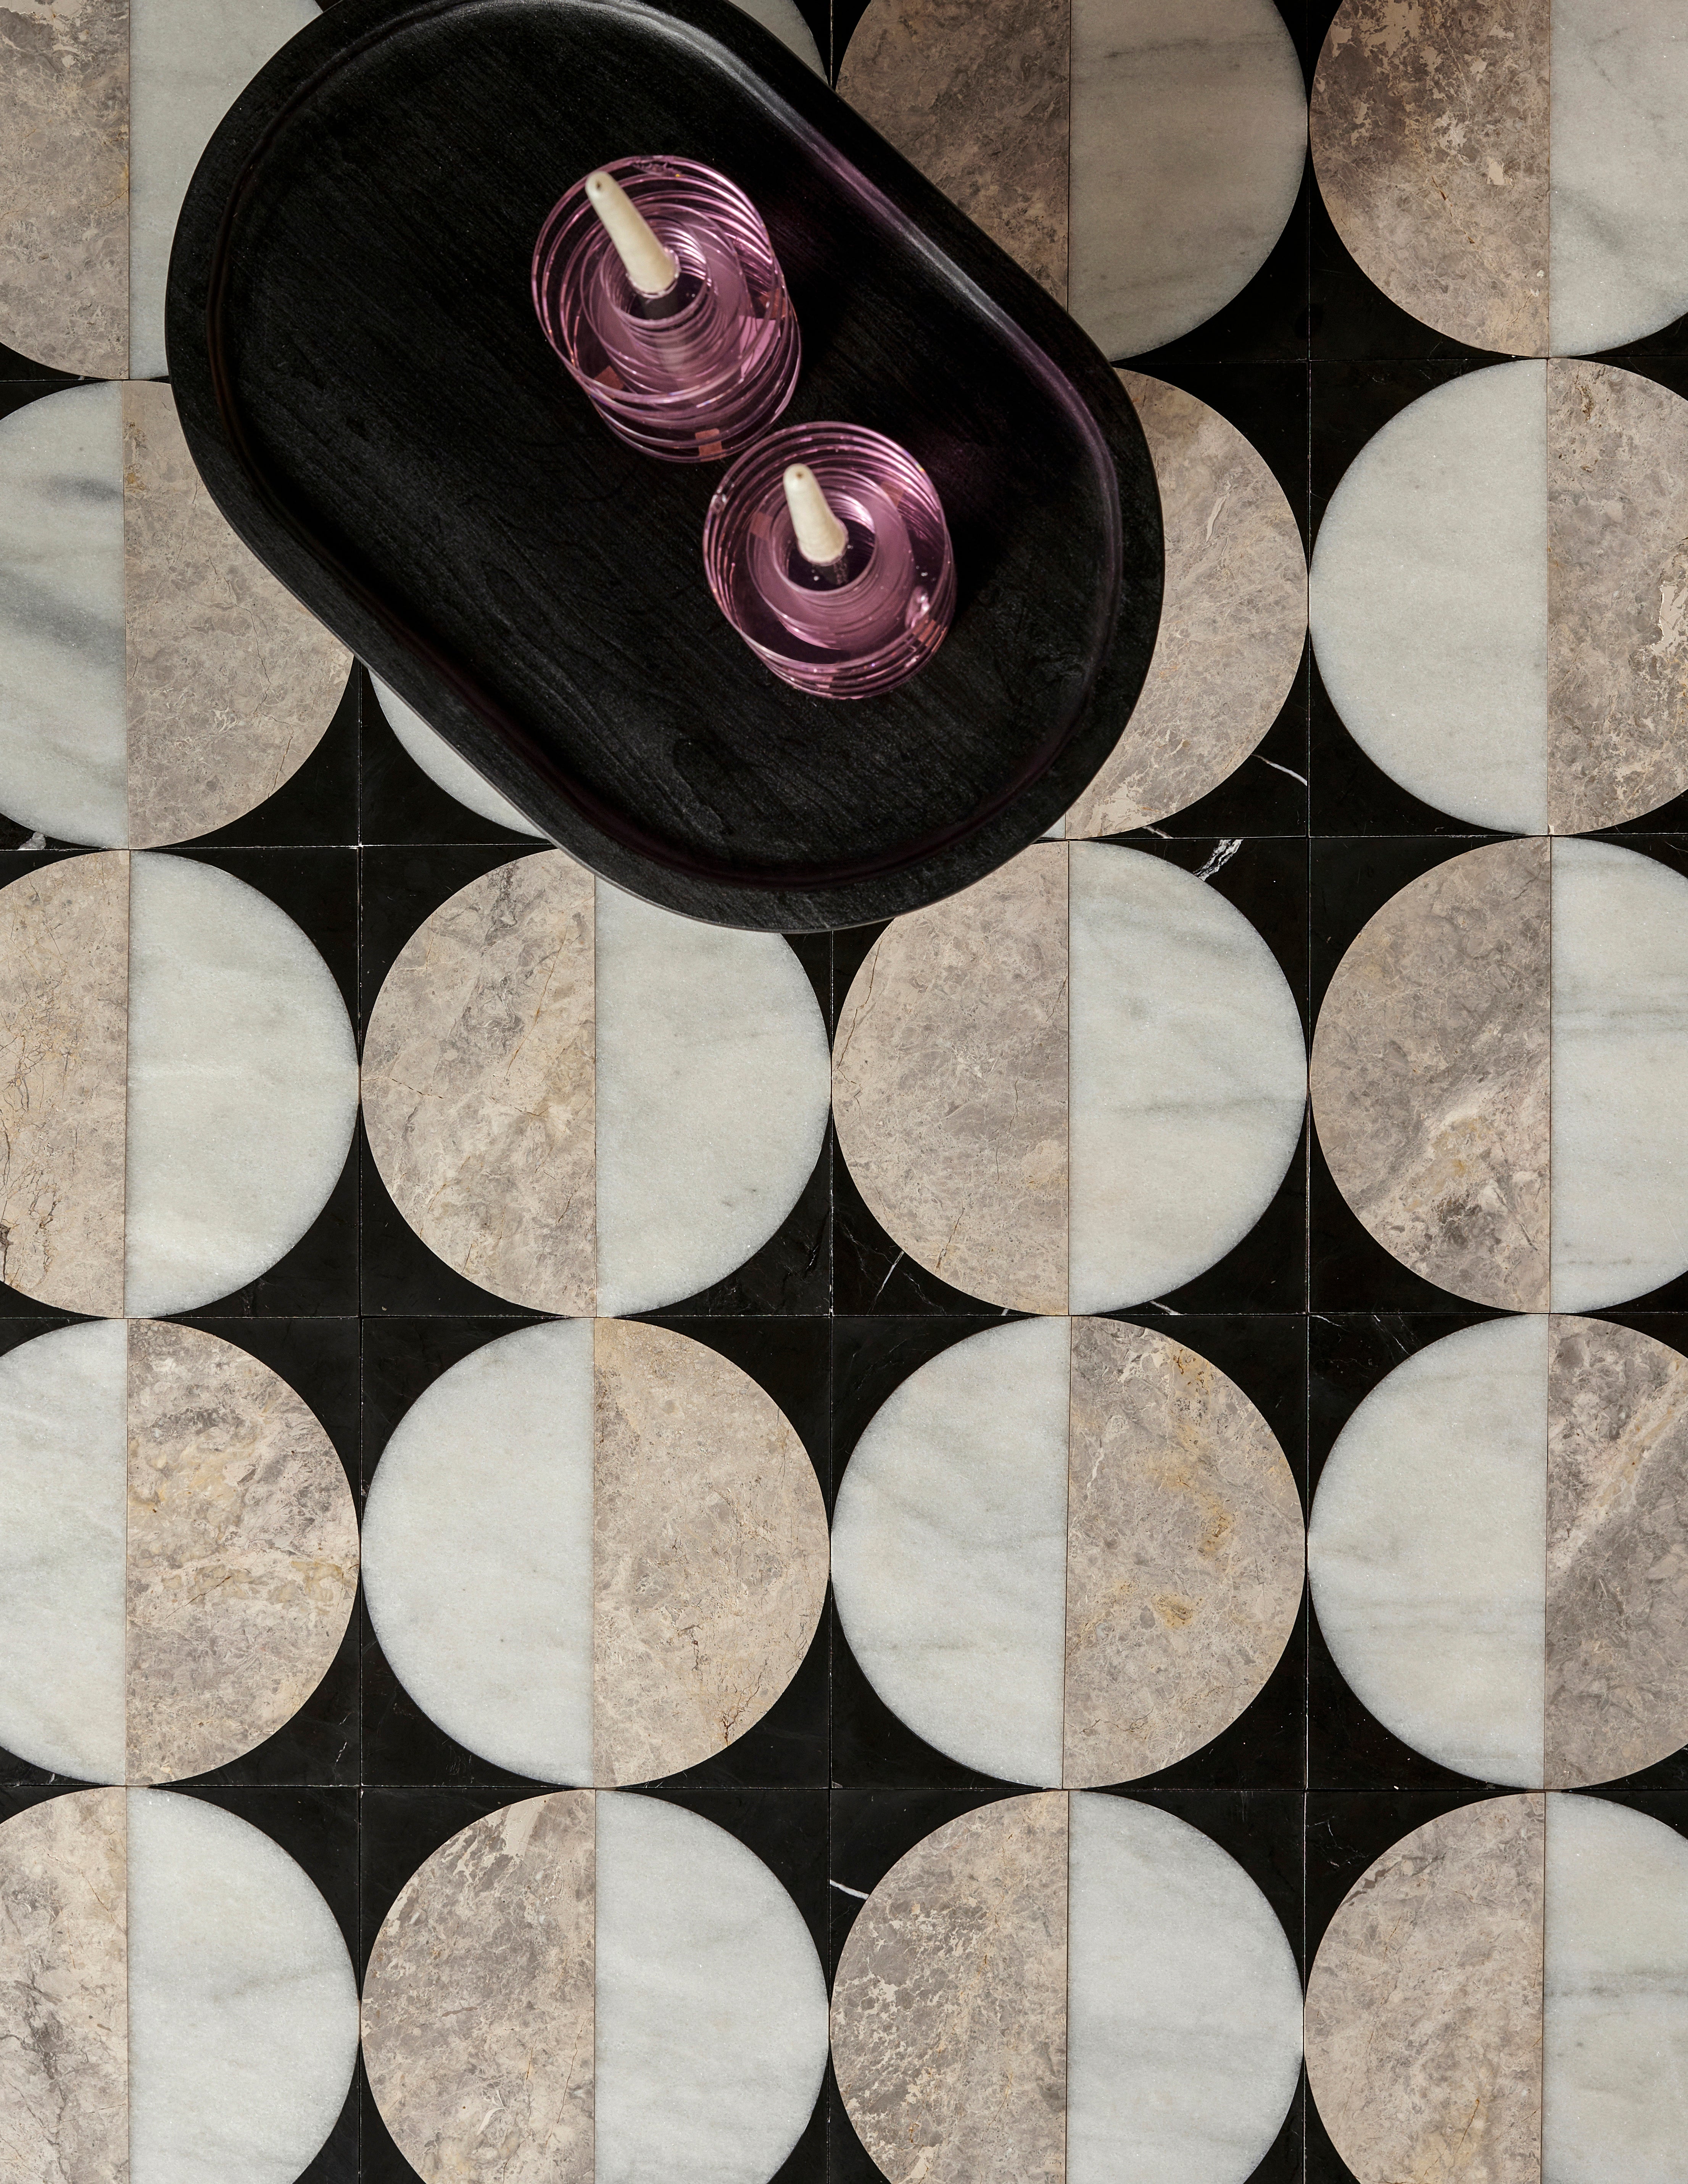
Over the Moon
Influenced by the Northern California coastal destination of Half Moon Bay, the Half Moon Bay marble tile is like a monochromatic sunrise or sunset on your floor or wherever else you choose to put this dreamy pattern. The marbles used in this bonded tile pattern include: Nero Marquina, Bianco Carrara, and Tundra Grey.
Want to go green? This pattern also comes in a different and equally beautiful variation with the inverted colours of emerald and white.
Yin and Yang
Whether you see yin and yang — or two faces, the moon phases, or something else entirely — what’s certain is that the Luna Marble tile is a simple yet dramatic statement. Its monochrome tones are courtesy of Nero Marquina, Bianco Carrara, and Tundra Grey marble.
Pyramid Scheme
Multicoloured and eye-catching, the Jigsaw marble tile is an abstract work of art for your walls and floors. The pyramid-shaped pattern features a bold combination of Nero Marquina, Rain Forest Green, Botticino, and Red Travertine tiles.
Also shown is a complementary Sega tile that features a contemporary, asymmetrical zig-zag pattern. It takes its name from the Italian word for “saw” — and you can see why! Both Bianco Carrara and Rain Forest Green tiles are included in this design.
Grid Glory
Craving your own Art Deco moment? You can achieve Golden-Age inspiration with the Marble Grids tile, which features a column design and pays homage to many of the iconic buildings of that glamorous era. The marbles used in this product include Pietra Grey, Botticino, and Rosso Lepanto.
Marble Tile Installation
When introducing marble tile to your space, many people choose to hire a professional installation team to ensure the smoothest result, especially if one of their first questions is “how do I cut marble tile?”
While DIY is trending, it’s not easy, and premier tile products must be combined with premier installation for the best result. At Otto Tile & Design, we can help you find an expert installer specializing in marble tile.
For those with hard-won DIY experience who want to take on a weekend project, here are some installation tips and tricks.
DIY Marble Tile Installation Tips
To Prepare for Installation:
-
You’ll want a good foundation to lay your tile. So, make sure the tile substrate is level, clean, dry, and free of oil, dust, or debris. You may want to use something like RLS (Raimondi Leveling System) to avoid lippage between tiles.
-
If you’re using the marble tiles in a wet area — like a shower or backsplash — apply a suitable waterproof membrane.
-
If you're using marble tile on the floor and have underfloor heating, make sure to turn the system off at least 12 hours before tiling begins to avoid any unwanted temperature fluctuations on the floor.
-
Rubber hammers or similar tools must not be used for setting the tiles, as they may cause hairline cracks.
-
Dust, dampness, and/or residue on your marble tiles can occur during the shipping process and should be dried and cleaned before installation.
Pro tip: Consider ordering at least 15% more marble tile than your measured area to account for cuts, onsite selection based on colour and tone variation, and potential breakage (or mistakes!).
To Install Your Marble Tiles:
-
Make sure to use a flexible, strong adhesive that’s appropriate not only for the substrate but also for marble tile.
-
To ensure proper bonding during installation, lightly wipe the back of each tile if there is excessive dust.
-
Install tiles with a minimum 1 mm grout spacing.
-
Use the double spreading method, applying adhesive to both the surface receiving the tile and the back of the tile, to ensure proper fixing.
-
If you’re wondering how to cut marble tile, it’s important to use a diamond blade wet saw. Make sure to wear protective eyewear while cutting. Be sure to wear gloves during installation, as tile edges may be sharp.
Pro tip: Due to variations in veining, pattern, and shades (which are inherent to natural stone like marble tile), we recommend arranging the tiles before installation to ensure you’re satisfied with the layout.
To Seal Your Marble Tiles:
Due to the porous nature of marble tiles, all tiles must be sealed before and after grouting. Sealant is a transparent liquid that will never change your tile’s colour, finish, or texture.
-
We recommend Stonetech Impregnator Pro Sealer or Miracle 511 Porous Plus Sealer.
-
Before applying the sealer, ensure that the tile is clean and completely dry.
-
Use a cloth, brush, or sponge to apply as directed on the package.
Pro tip: Always test the sealer on a small area first to make sure the tiles are not stained. Once applied, if water beads on the tiles' surface, the sealant has been applied correctly.
To Grout Your Marble Tiles:
Grouting should be applied after a waiting period, typically one day. However, the exact amount of time depends on the surface, the weather conditions (dry versus humid), and the type of adhesive used.
-
We recommend Mapei Ultracolour Plus grout for marble tile installation. Follow the Mapei application instructions to avoid the risk of staining or grout haze.
-
As you start applying grout, it’s best to work diagonally over the tiles in small sections of 2 to 4 square meters. This is so you can clean any excess grout from the tile as you go before the grout skins over and dries on the surface.
-
Wipe off excess grout quickly with clean water and a soft cloth or sponge to avoid staining.
-
Once the setting and grouting are complete, allow an extra drying period before use to avoid movement and cracks
Pro tip: Always test the grout on a small area to ensure the tiles are not stained. And make sure to change your water bucket frequently to prevent the occurrence of a haze on the tile surface!
Marble Tile Care and Maintenance
If you’re wondering how to clean marble tile, here are some easy dos and don’ts to follow.
-
Do immediately clean any spills and don’t allow liquids to sit on the tile surface, because excess fluid can stain, pit, or crack the tile.
-
Do sweep regularly, because abrasive dirt and materials can scratch the surface.
-
Do mop floors regularly with clean water and pH-neutral cleaner.
-
Do use non-slip mats or area rugs inside and outside entryways to prevent corrosive materials from scratching or dirtying the tile surface.
-
Do a wipe-down of marble shower walls and floors after each use to prevent limescale stains, soap scum, and mold.
-
Don’t use worn vacuum cleaners, as the metal or plastic attachments or wheels could scratch the marble surface.
-
Don’t use harsh chemicals, acidic products, oil, or hair dye products coming in touch with your marble tile. These stains can be difficult to remove from marble, and they often require a professional cleaning service
Where to Buy Marble Tile
With this as your guide, it’s time to pick your marble tiles, order your samples, and bring your vision to life!
With marble tile, quality counts, especially when you’re creating a living work of art and a beautiful, long-lasting result.
Otto Tiles & Design is here to help you — every tiled step of the way. Our marble is not just a material; it is a statement of elegance, craftsmanship, and exclusivity, found nowhere else in the world.
Our Signature Marble Collection is designed in London by Otto’s founder and creative director, Damla Turgut, and expertly hand-crafted by skilled artisans. It features bold, innovative pieces with Art Deco-influenced patterns and designs that inspire creativity and design-led interiors reminiscent of this much-admired era.
