- No Products In The Cart
- start shopping
Encaustic Cement Tile Installation Tips
Although DIY has become a popular trend in recent years, perfect tiling still requires a bit of mastery and experience. Please bear in mind, these installation tips under this section for general information purpose only. If you have no experience in tiling, we highly recommend an experienced tiler.
How to install handmade encaustic cement tiles?
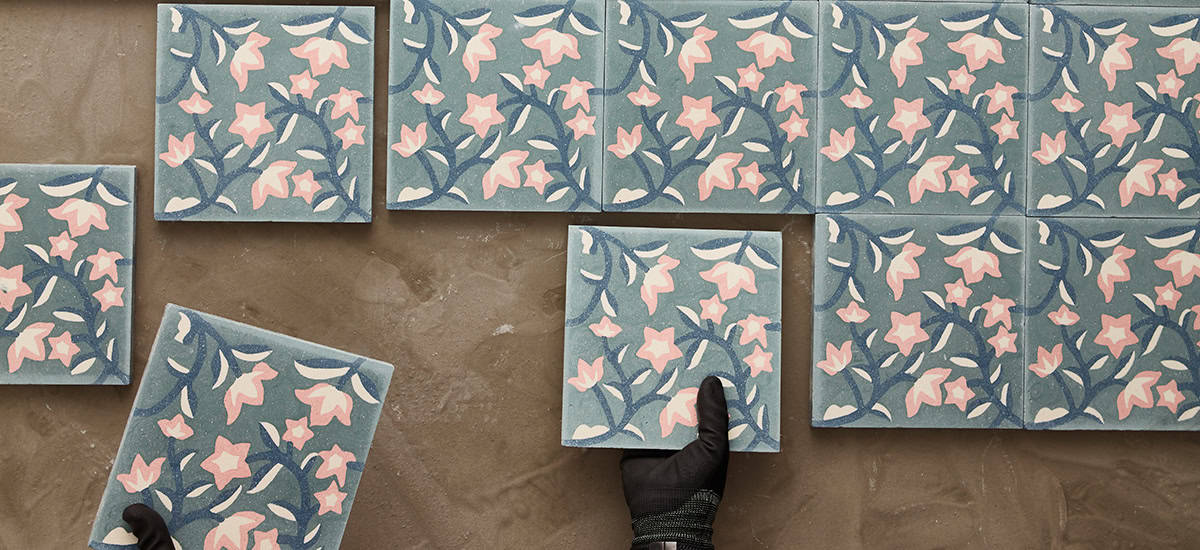
Welcoming Your Tiles
Each tile is unique and has slight colour shades in it. Please blend the tiles from different boxes once to mix the shades.
Since the encaustic cement tiles have a water-dense production process, the tiles contain moisture. If the tiles are kept in the box for a long time, the humidity would penetrate the tiles more profoundly and may cause water stains. Tiles must be removed from their boxes and dried thoroughly as soon as the tiles are received.
Take the products out of their boxes and lay them out with the patterned part facing up. Do not stack tiles on top of each other.
Dust, wet and shipping residue might be expected and should be dried/cleaned before installation.
Minor irregularities such as chipped edges and cracked surfaces can be expected, which are pretty usual for a handmade encaustic cement tile.
We suggest adding at least %15 overage to your order due to tile cuts for covering edges/corners, potential breakage occurs during the transportation and installation. Particularly if you have a strict deadline and your project schedule wouldn’t tolerate extra production and shipment duration.
Smudging is caused by friction during transport and clouding on tile surfaces where the pre-application of sealant has humidified rare. But sometimes, these occasions may occur.
Smudging tends to be more noticeable on high-contrast colours such as black and white patterned tiles.
Tiles can be easily sanded by hand or a wet grinding machine with 400 grit sandpaper.
Sanding will effectively remove the tile’s top layer and fresh pigments from underneath.
Reducing carbon footprint and sustainability is crucially essential for us. Your products are delivered to you in recyclable cardboard boxes. We do not use a sheet of paper or Polystyrene Foam Brick between the tiles that are generally still moist from production during shipping. Sheets of paper and foam bricks can turn to mould or contribute to clouding.
Large orders are delivered on pallets as kerbside. When you receive the products, you may not be able to take them out of the pallet immediately, please protect your products by considering the weather conditions.
Preparation
The surface must be level, dry, clean and free from dust and oil.
Encaustic cement tiles are handmade products, and they are produced using natural materials. Slight thickness, weight and colour tone differences are inherent features. To avoid stacking similar tiles in the same place, tiles must be picked from different boxes.
If you need to cut the tiles, the tiles must be cut with a diamond cutter or angle grinder and cleaned immediately afterwards.
If installation problems occur from substrate or construction engineering and/or installation issues, please refer to your project architect, structural engineer and/or a tiler for the best results for your tile finish.
To ensure proper bonding during installation, we recommend lightly wiping the back of each tile if there is excessive dust.
As a standard rule, installation means acceptance. Do not install if there is a visible issue on the tile, and please get in touch with us before installation. Otto Tiles does not cover misuse by the tiler/builder/contractor or end-user, including but not limited to negligence and physical and/or chemical abuse.
Installation
The tile installer must allow space for grouting when setting the tiles. We recommend 1mm for the best aesthetic results.
A flexible, strong adhesive is recommended for areas subject to sudden changes in temperature. Waterproofing materials must be used for wet areas. It would be more accurate for your architecture or tiler to advise how much adhesive you need to use according to the project surface, square meter and levelling.
- If applicable, floor heating systems must be turned off at least 12 hours before the tile setting. Leave a minimum of 3 mm grout space if you install tiles on heated underfloor floors.
- Please seal tiles before and after grouting. It is highly recommended for dark-coloured grouts.
- Rubber hammers or similar tools must not be used for setting the tiles as they may cause hairline cracks.
- Encaustic cement tiles can be installed on backsplashes, in bathrooms and showers. A waterproof membrane is needed to use under the tile.
- Encaustic cement tiles are not suitable for pool or fountain use.
- Otto Tiles is a tile supplier; what is written in this guide is for advice. Otto Tiles does not cover misuse by contractors, tilers and end-user, including but not limited to negligence, physical and/or chemical abuse
Grouting
Otto Tiles only recommends Mapei Ultracolor Plus grout for cement tile installation. Please follow the Mapei application instructions to avoid the risk of staining/grout haze.
Recommended grout gap size is 1 mm. They are suitable for underfloor heating but remember to leave a minimum 3 mm grout gap.
Grouting should be applied after an interval, typically one day. The waiting time depends on the surface, environmental conditions and the type of adhesive used.
Always test the grout on a small area to ensure the tiles are not stained.
Grout small areas between 2 sqm to 4 sqm at a time so that cleaning can begin before the grout skins over and dries on the tile surface.
Once the setting and grouting are complete, allow an extra drying period before use to avoid movement and cracks.
Excess grout must be cleaned immediately with clean water and a clean, damp cloth/sponge.
Change your water bucket frequently to prevent the occurrence of a haze on the tile surface.
Use a “clean as you go” approach to spreading and washing the grout to ensure cleaning begins before the grout skins over and dries on the tile surface. Do not allow the grout to harden on the surface.
If the grout hardens, you can clean it with non-acidic chemicals, but you must rinse immediately with a sponge and water.
Grout colour selection is always up to our client and/or their architect. However, Otto Tiles is often asked for our opinion on the best grout selections for our tiles. We are pleased to give you grout colour options that will go with your tile.
Grout staining is only a problem if the guidelines set for Lithofin MN Stain Stop and Ultracolour Plus by Mapei aren’t followed properly.
Please make sure to follow the Mapei Ultracolour Plus application and cleanup instructions to avoid the risk of staining/grout haze and to allow for easy application and cleanability. Read all installation instructions thoroughly before use.
If your contractor/tiler selects brands other than Mapei grout or Lithofin sealant, please have them reach out to their representatives of those manufacturers for advice and support on failures.
Sealant
Due to the porous nature of encaustic cement tiles, all tiles MUST be sealed before and after grouting.
Otto Tiles only recommends Lithofin MN Stain Stop. The sealant is a transparent liquid and will never change your tile’s colour, finish and texture.
Lithofin Sealant estimated coverage is 3 to 6 m²/L
Please make sure to follow the Lithofin application instructions.
Make sure the sealant is dry, and always test on a small area to ensure the tiles are not stained.
The surface to be treated must be absorbent, clean and completely dry. Suitable application tools: cloth, brush or sponge.
If your contractor/tiler has any issues or questions regarding this sealant, please have them reach out to Lithofin directly.
Tip: If water does not bead up on the surface of the tiles, then the sealant is not applied correctly.
Aftercare
Over time, a natural patina will occur on your tiles due to their nature, and they will develop a rustic aged look. Some staining is part of this, and it’s totally normal.
Sealing annually is sufficient for high-traffic areas.
Single-coat reapplication of the penetrating sealant is required once a year in shower applications due to continuous exposure to water.
Sealant durability is up to 5 years on outdoor surfaces. Indoor durability depends on the care products used.
Check with the Lithofin Sealant tech support at 01962732126 for the best advice on applying and maintaining sealants.
Cleaning
-
Immediately clean up spills, and do not allow liquids to sit on the tile surface. Excess fluid can stain, pit and crack the tile.
-
Vacuum or sweep regularly; abrasive dirt and materials can scratch the surface.
-
Non-slip mats or area rugs should be placed inside and outside entranceways to remove corrosive materials that can scratch and dirty the tile surface.
-
Mop floors regularly with clean water and pH-neutral cleaner. Otto pH Neutral Soap is available in the London showroom and on the website.
-
Shower wall and floor installations should be squeegeed after each use to prevent limescale stains, soap scum and mould.
-
Always avoid harsh chemicals and acidic products.
-
You may need to clean the area with a wet grinding machine for stubborn stains. The result will be a gentle removal of a micro-layer, exposing a like-new pigment surface. Do not forget to reseal your tiles after this process.
-
Oil and hair dye product stains are difficult to remove from cement. They will require the use of a professional cleaning service.